School
School program
Teaching method
During the period of field work the Internet site acted also as news medium to announce the opening of the excavation for public and the special visitor days. Teachers could download their information and letter of teaching methods in preparation for a visit with their class to excavation. Also short films concerning all stages of digging up, documenting and analysing the features and finds and photograph of the field work and the first results were offered.
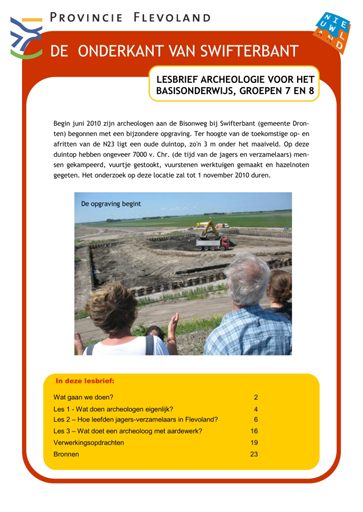
For the visit of school classes to the excavation an entirely own programme has been developed. Within the Dutch education system several learning aims have been prescribed and a number of them can be related directly to historical education and archaeology. For this reason pedagogues with an archaeological experience have been asked to work out an complete own programme. The programme consisted of three components which both jointly and separately could be performed with the children. These subjects have been added in a letter of teaching methods which was made available free of charge by the Internet site (fig. 1). The lessons introduced in the letter of teaching methods have been written in a way that they still can be used after the excavation has finished.

Figure 1: First page of the teaching method and information on archaeology, the excavation and the lessons. Picture Vestigia BV ©
Three lessons
Lesson 1 consists of the explanation `what does an archaeologist in fact do?’. It starts with a short introduction where the name `archaeology’ comes from. Then it explains with a series of small films on the Internet site dealing with the great variety of activities which are carried out at an excavation and what the archaeologist does with the finds and the drawings when he is ready with the fieldwork. The children can afterwards discuss with each other concerning which objects and tools are necessary for archaeologists during their activities.
Lesson 2 is aimed at the life of hunter foragers and in particular those in Flevoland. Again the children can examine small films e.a. on the life of the prehistoric occupants of the area at the Internet site in. Using questionnaires concerning what can hunter foragers collect and hunt in a forest, an open field of water and which objects of them we nowadays have in a museum, the children get a picture of what we exactly know of the ancient population. Important fourth component of this lesson is the instability of the prehistoric materials and which objects will remain after more than 8000 years covered in soil. This is first explained concerning the hunter foragers, afterwards the children must outline in a picture of their own bedroom what will still be there over 1000 years. This indicates how difficult it is to create a complete picture of who slept in this chamber with the little left. A difficulty an archaeologist also has to deal with.
Lesson 3 deals more in what an archaeologist does with ceramic. Explained is how pottery is made, the children can examine again a small film and several image concerning ceramics and pottery production. Then the children themselves can start with three activities: create a bowl with clay, glue together some shards of simple pottery and drawing ceramic pots and shards. This are all three what more difficult activities, more targeted on children with the age of 12 to 14.
School teaching method and lessons
Visit with school
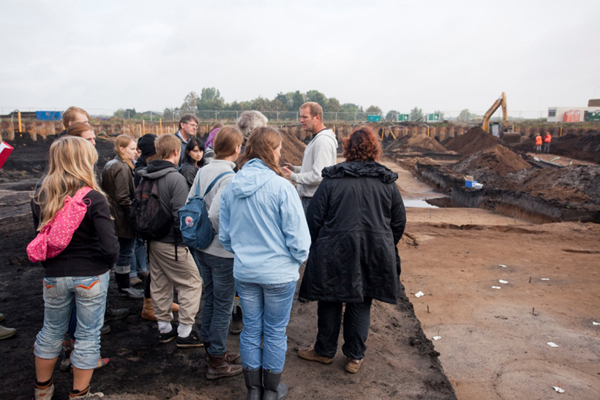
During the excavation of the Mesolithic site in Flevoland the children visited the excavation after these lessons. There they saw the archaeological work in progress. The children got a guided tour, witnessed how the archaeologists collect, clean and administer the finds and how documentation is processed. After the visit the possibility was offered to pay a visit to the museum. With this second visit the process of search, find, process and present a archaeological object is completed.

Figure 2: School classes visit the excavation and have a guided tour by an archaeologist. Picture Vestigia BV ©
Post-visit school activity
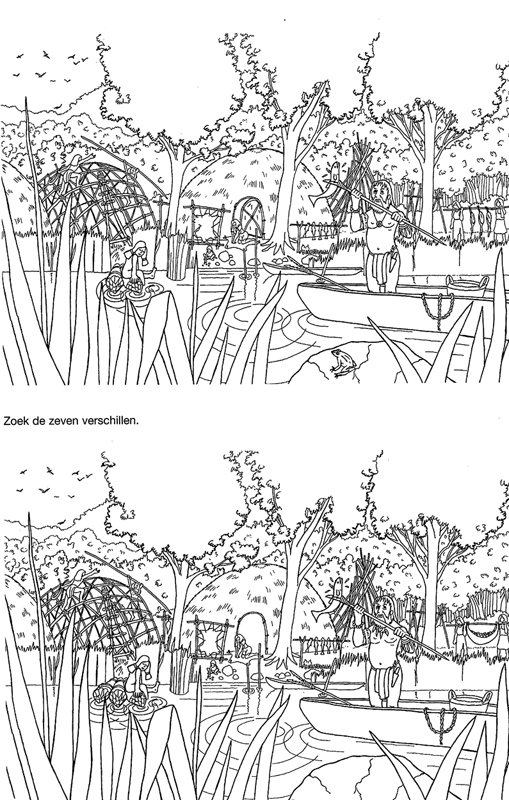
For schools which after the visit to the excavation or the museum wanted to continue the lessons four extra tasks were even offered. These consisted of writing a report concerning the visit to the excavation or the museum for the school newspaper, arranging a small exhibition of self collected archaeological of historical objects, making a poster for the exhibition in the museum or the self arranged presentation at school and making a plan for an own excavation. For the younger children a colouring picture of a Mesolithic camp site with seven differences was made. Also a very popular document to take home during the visitors days.

Figure 3: The colouring picture on a Mesolithic camp site with 7 differences. Picture Vestigia BV ©
